Step 1. Sign in
Welcome to Zoom! Follow these steps to get into your account.
- To create an account, go to https://bcm.zoom.us and click Sign In in the upper right-hand corner of the page.
- Log in with your BCM Username and Password.
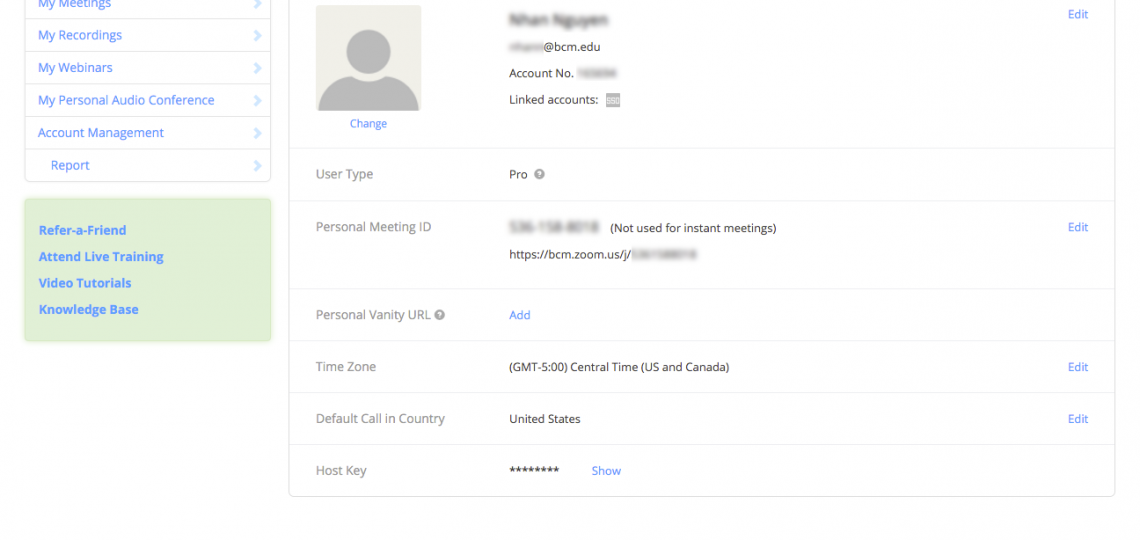
After successfully being signed in, you will be taken to your My Profile page.

My Profile Page
Step 2. Configure Your Profile and Settings
On the My Profile page, you can change your:
- Avatar (used when you turn off your camera and for our IM feature)
- Personal Meeting ID/Personal Vanity URL
- Time Zone
- Default Call in Country
- Password
- Host Key (used for Personal Audio Conference)
After configuring your profile, click on the My Settings tab to set your In Meeting, Email Notification, Security, and Scheduling Privileges preferences.
Step 3. Install Zoom
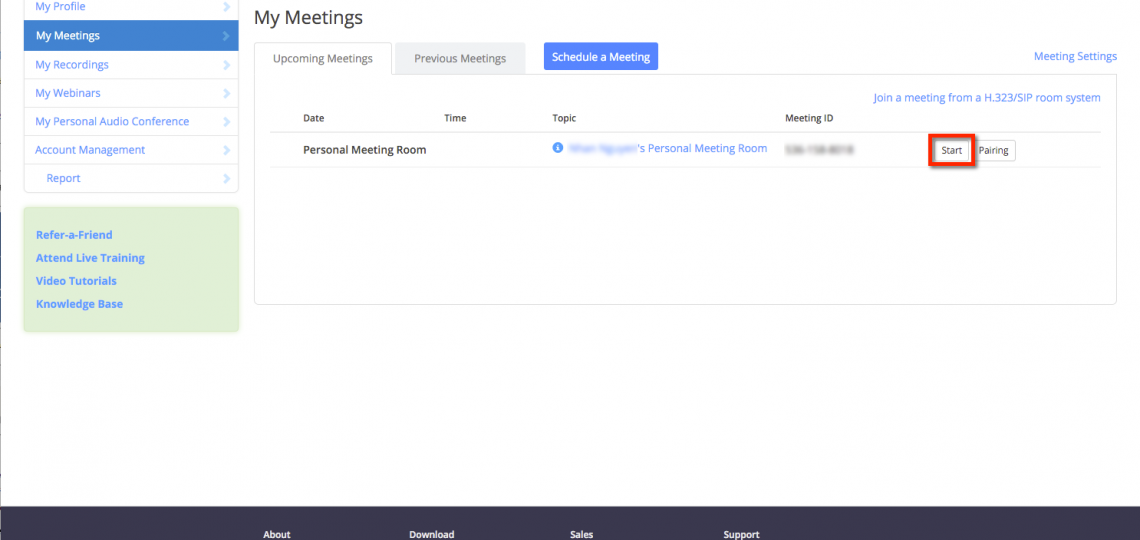
Now we need to get the actual Zoom software installed on your PC/Mac. The easiest way to do this is to head to https://zoom.us/meeting and click Start to the far right of your Personal Meeting Room.

On the right side of your Personal Meeting row on the My Meetings page, click the Start button.
Once you click the Start button, your browser will begin the installation of the Zoom client and you will join your own Personal Meeting Room. Once successfully installed and the Meeting is started, you should be looking at yourself via your webcam. Feel free to click on End Meeting at the lower right-hand side of the Zoom interface.
Set up Zoom to Start with Your Computer
You can set Zoom to automatically start when your computer starts, so you can join or create meetings more quickly.
- On Windows machines, open Zoom and click Settings at the top right to open the Settings window.
- Click General on the left side to show the General settings for Zoom on the right side of the pane.
- Check the box "Start Zoom when I start Windows."
On Macs, right-click (or Option + click) the Zoom icon in the dock at the bottom of your screen, then select Options > Open at Login.


